
New possibilities for the asset pages
The asset page provides detailed information about an asset. With the release of the new UI/UX, Collibra now introduces an “At a glance” field, and allows its users to adjust asset pages to more tailored needs. In addition to this, one can decide to show or not to show empty fields.
Just like with the previous UI, the asset page’s scope can be adjusted, i.e., what characteristics does the user want to see? In addition to the scope, the asset page’s layout, and the asset’s icon and colour can be edited.
In this blog, we will look into those customisation options.
Effects of adjusting the asset’s assignment
First, one should take several best practices into account before adjusting the asset page’s scope.
Keep the Global Assignment as it is, so that the default (out of the box) settings of Collibra do not get overwritten. Instead, add a new assignment and adjust the scope to meet your preferences for the asset page.
Pre-document your asset model and the associated mandatory characteristics, such as relations and attributes. By doing so, you can collaboratively decide which characteristics should be displayed on the asset page and in what order. Additionally, maintaining an up-to-date overview of the asset model, including its characteristics, enhances the use case implementation process, facilitates communication about the Data Intelligence implementation, and serves as a convenient reference file.
When adjusting the asset type’s assignment, you can determine what characteristics (attributes & relations) you want to show on the asset page. Below, we will explore the customisation of an asset type’s assignment for, in this case, the Data Set asset.
By going to “Settings → Operating Model → Asset Types → (asset type of your choice)”, you will arrive at the asset’s “Overview”, where you find the asset’s default parent asset and definition.
By navigating to “Global Assignment → Characteristics”, you can observe what default, out-of-the-box (if not yet adjusted) characteristics are assigned to the asset to be filled in, which can then be added to the asset page.
Despite that we will mainly focus on asset page configuration, and hence the tab “Characteristics” in this blog, we will briefly introduce the other tabs below the Global Assignment.
When navigating to “Domain Types”, you can see in what domain type the asset can be ‘stored’.
In “Statuses”, you find what conditions can be assigned to the asset, including their definitions.
In “Articulation score rules,” you can see how the status of an asset affects its articulation score, such as its performance on implementation. An asset receives the maximum articulation score of 100 once it is implemented. If the asset is newly created and has not yet gone through the approval process, it is given a default status of ‘candidate’, which corresponds to an articulation score of 5.
In “Data quality rules”, you can generate rules that assess the quality of an asset using a predefined aggregation path and specific metrics. The results of these rules are displayed on a Data Quality dashboard within the asset page for the asset type to which the Data Quality rule is assigned.
In “Validation rules”, you can generate rules to validate whether the asset meets certain criteria. For example, you want the asset to have the attribute “Definition” filled in with a minimum of 10 characters, it starts with a capital letter, and it ends with a (.). Depending in whether the asset meets these criteria, the asset will receive a positive validation (✓ valid) or a negative validation (✗ invalid).
How the Asset Page is built up
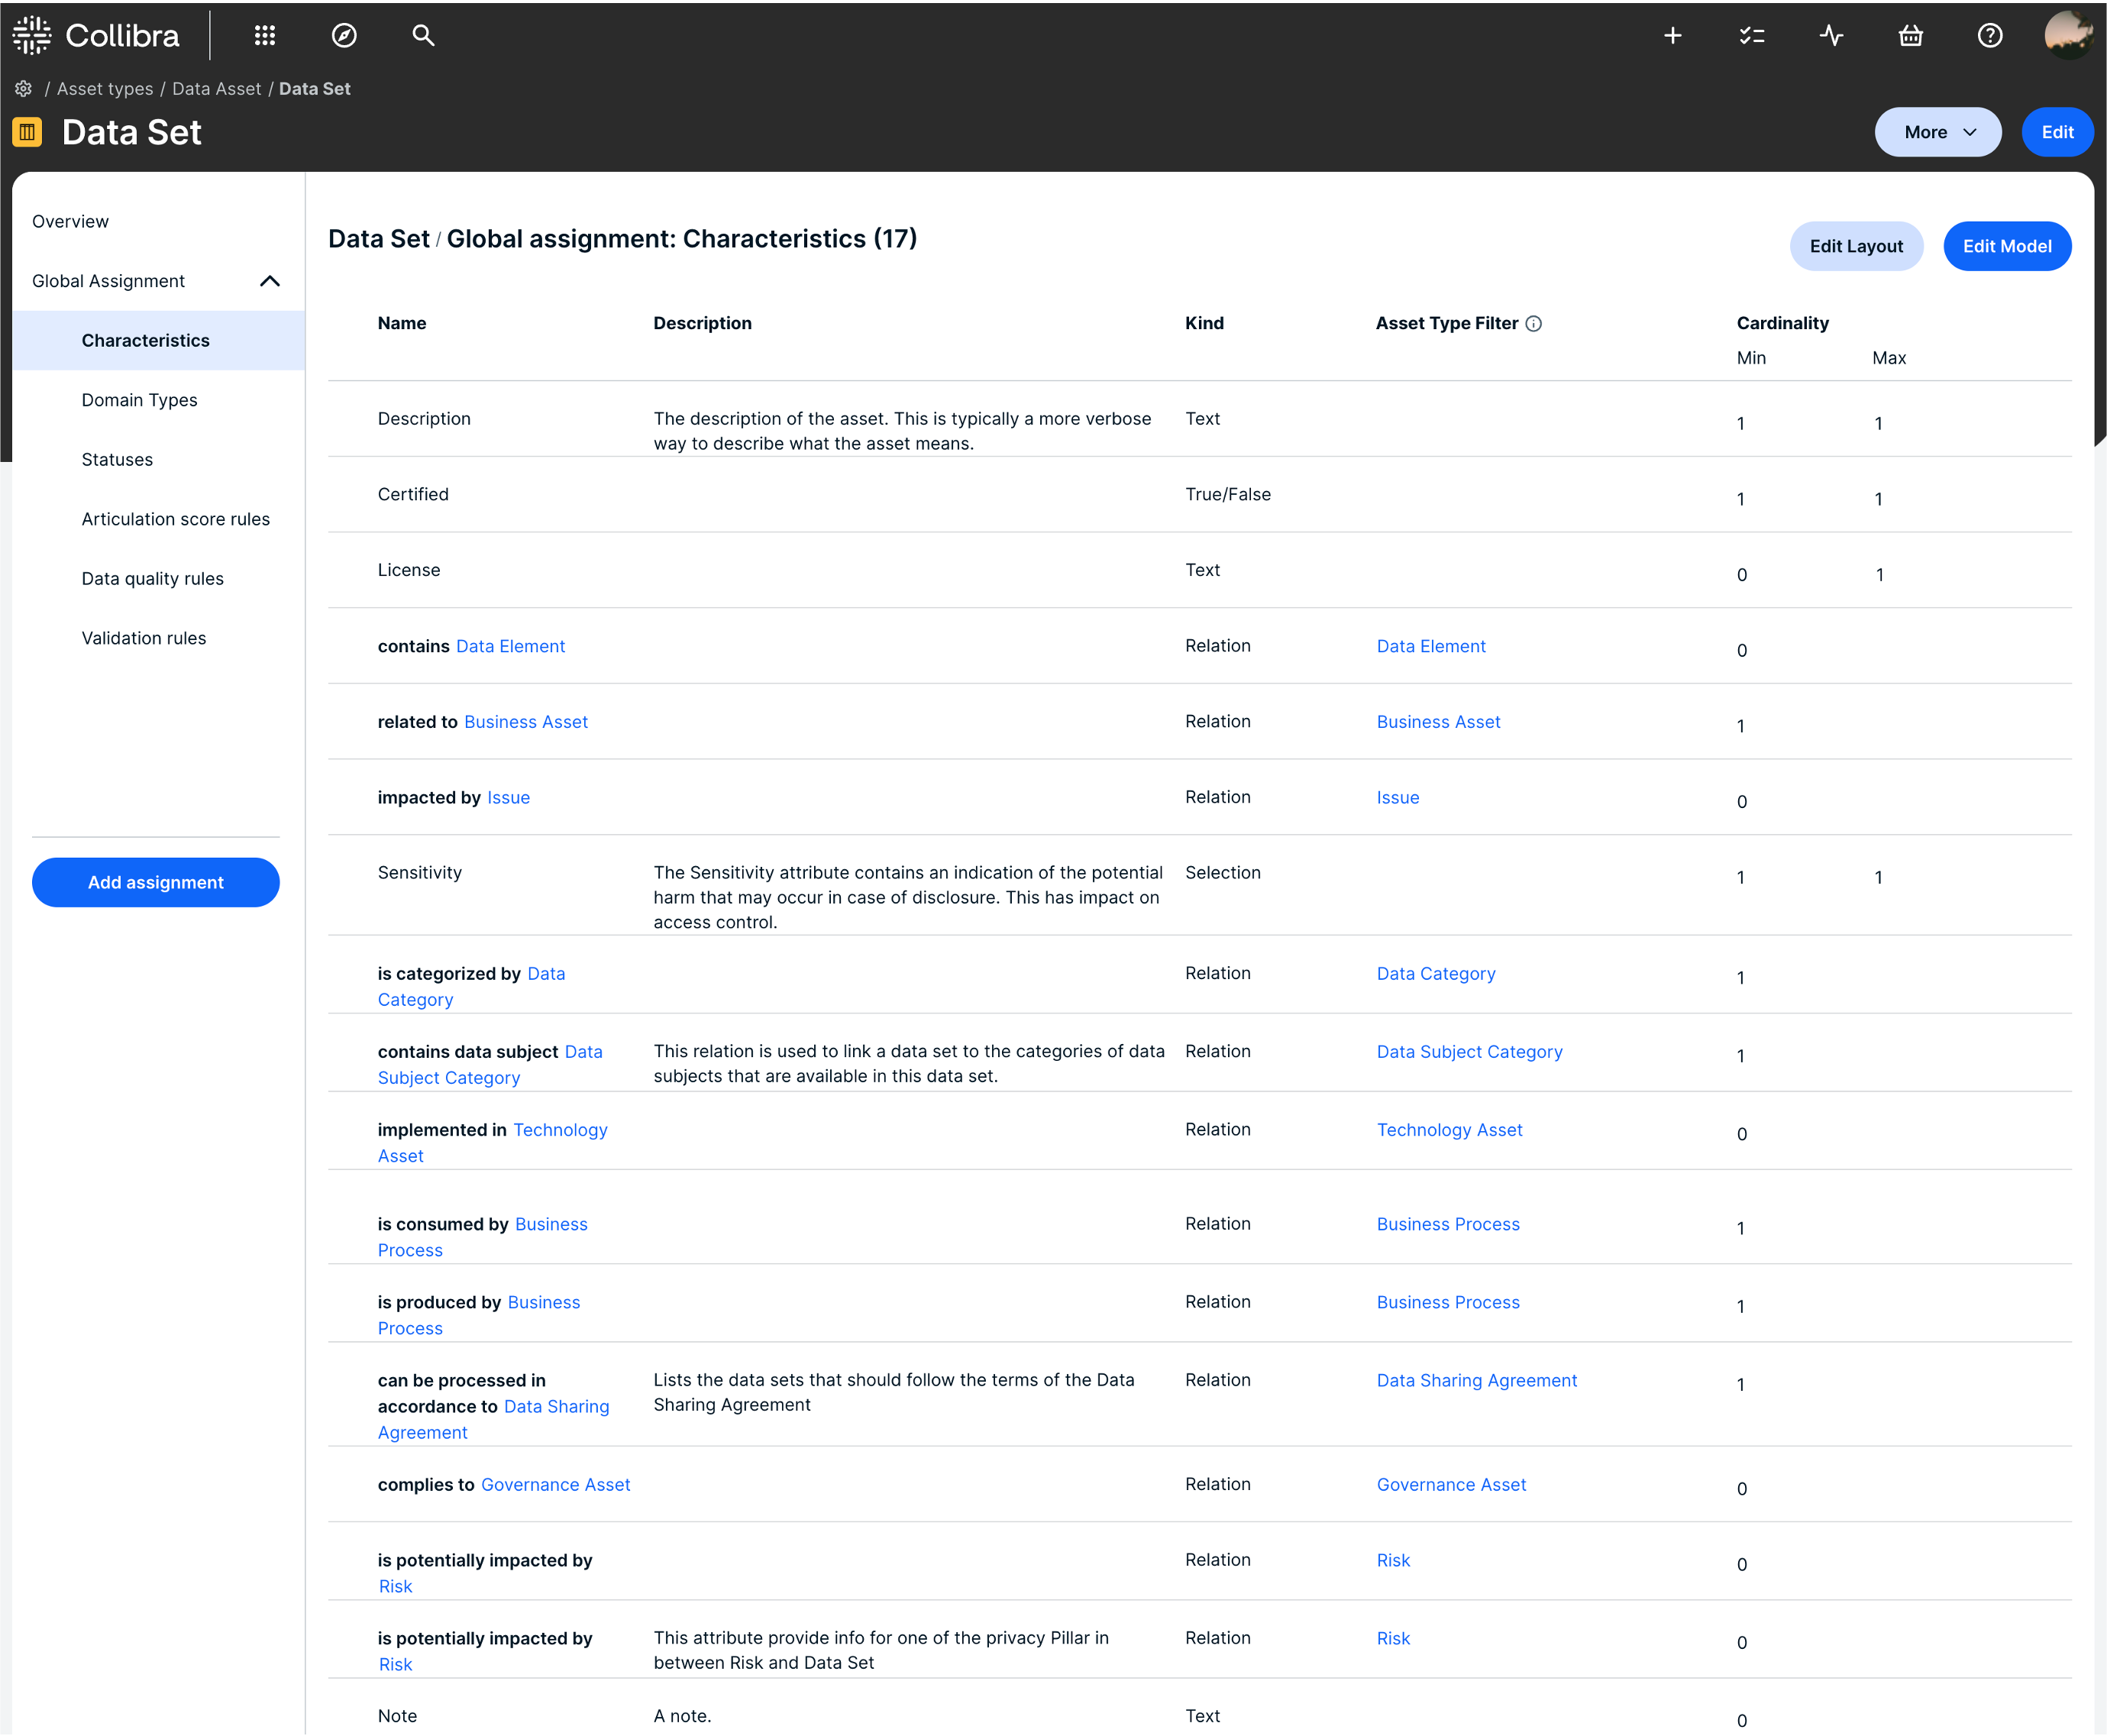
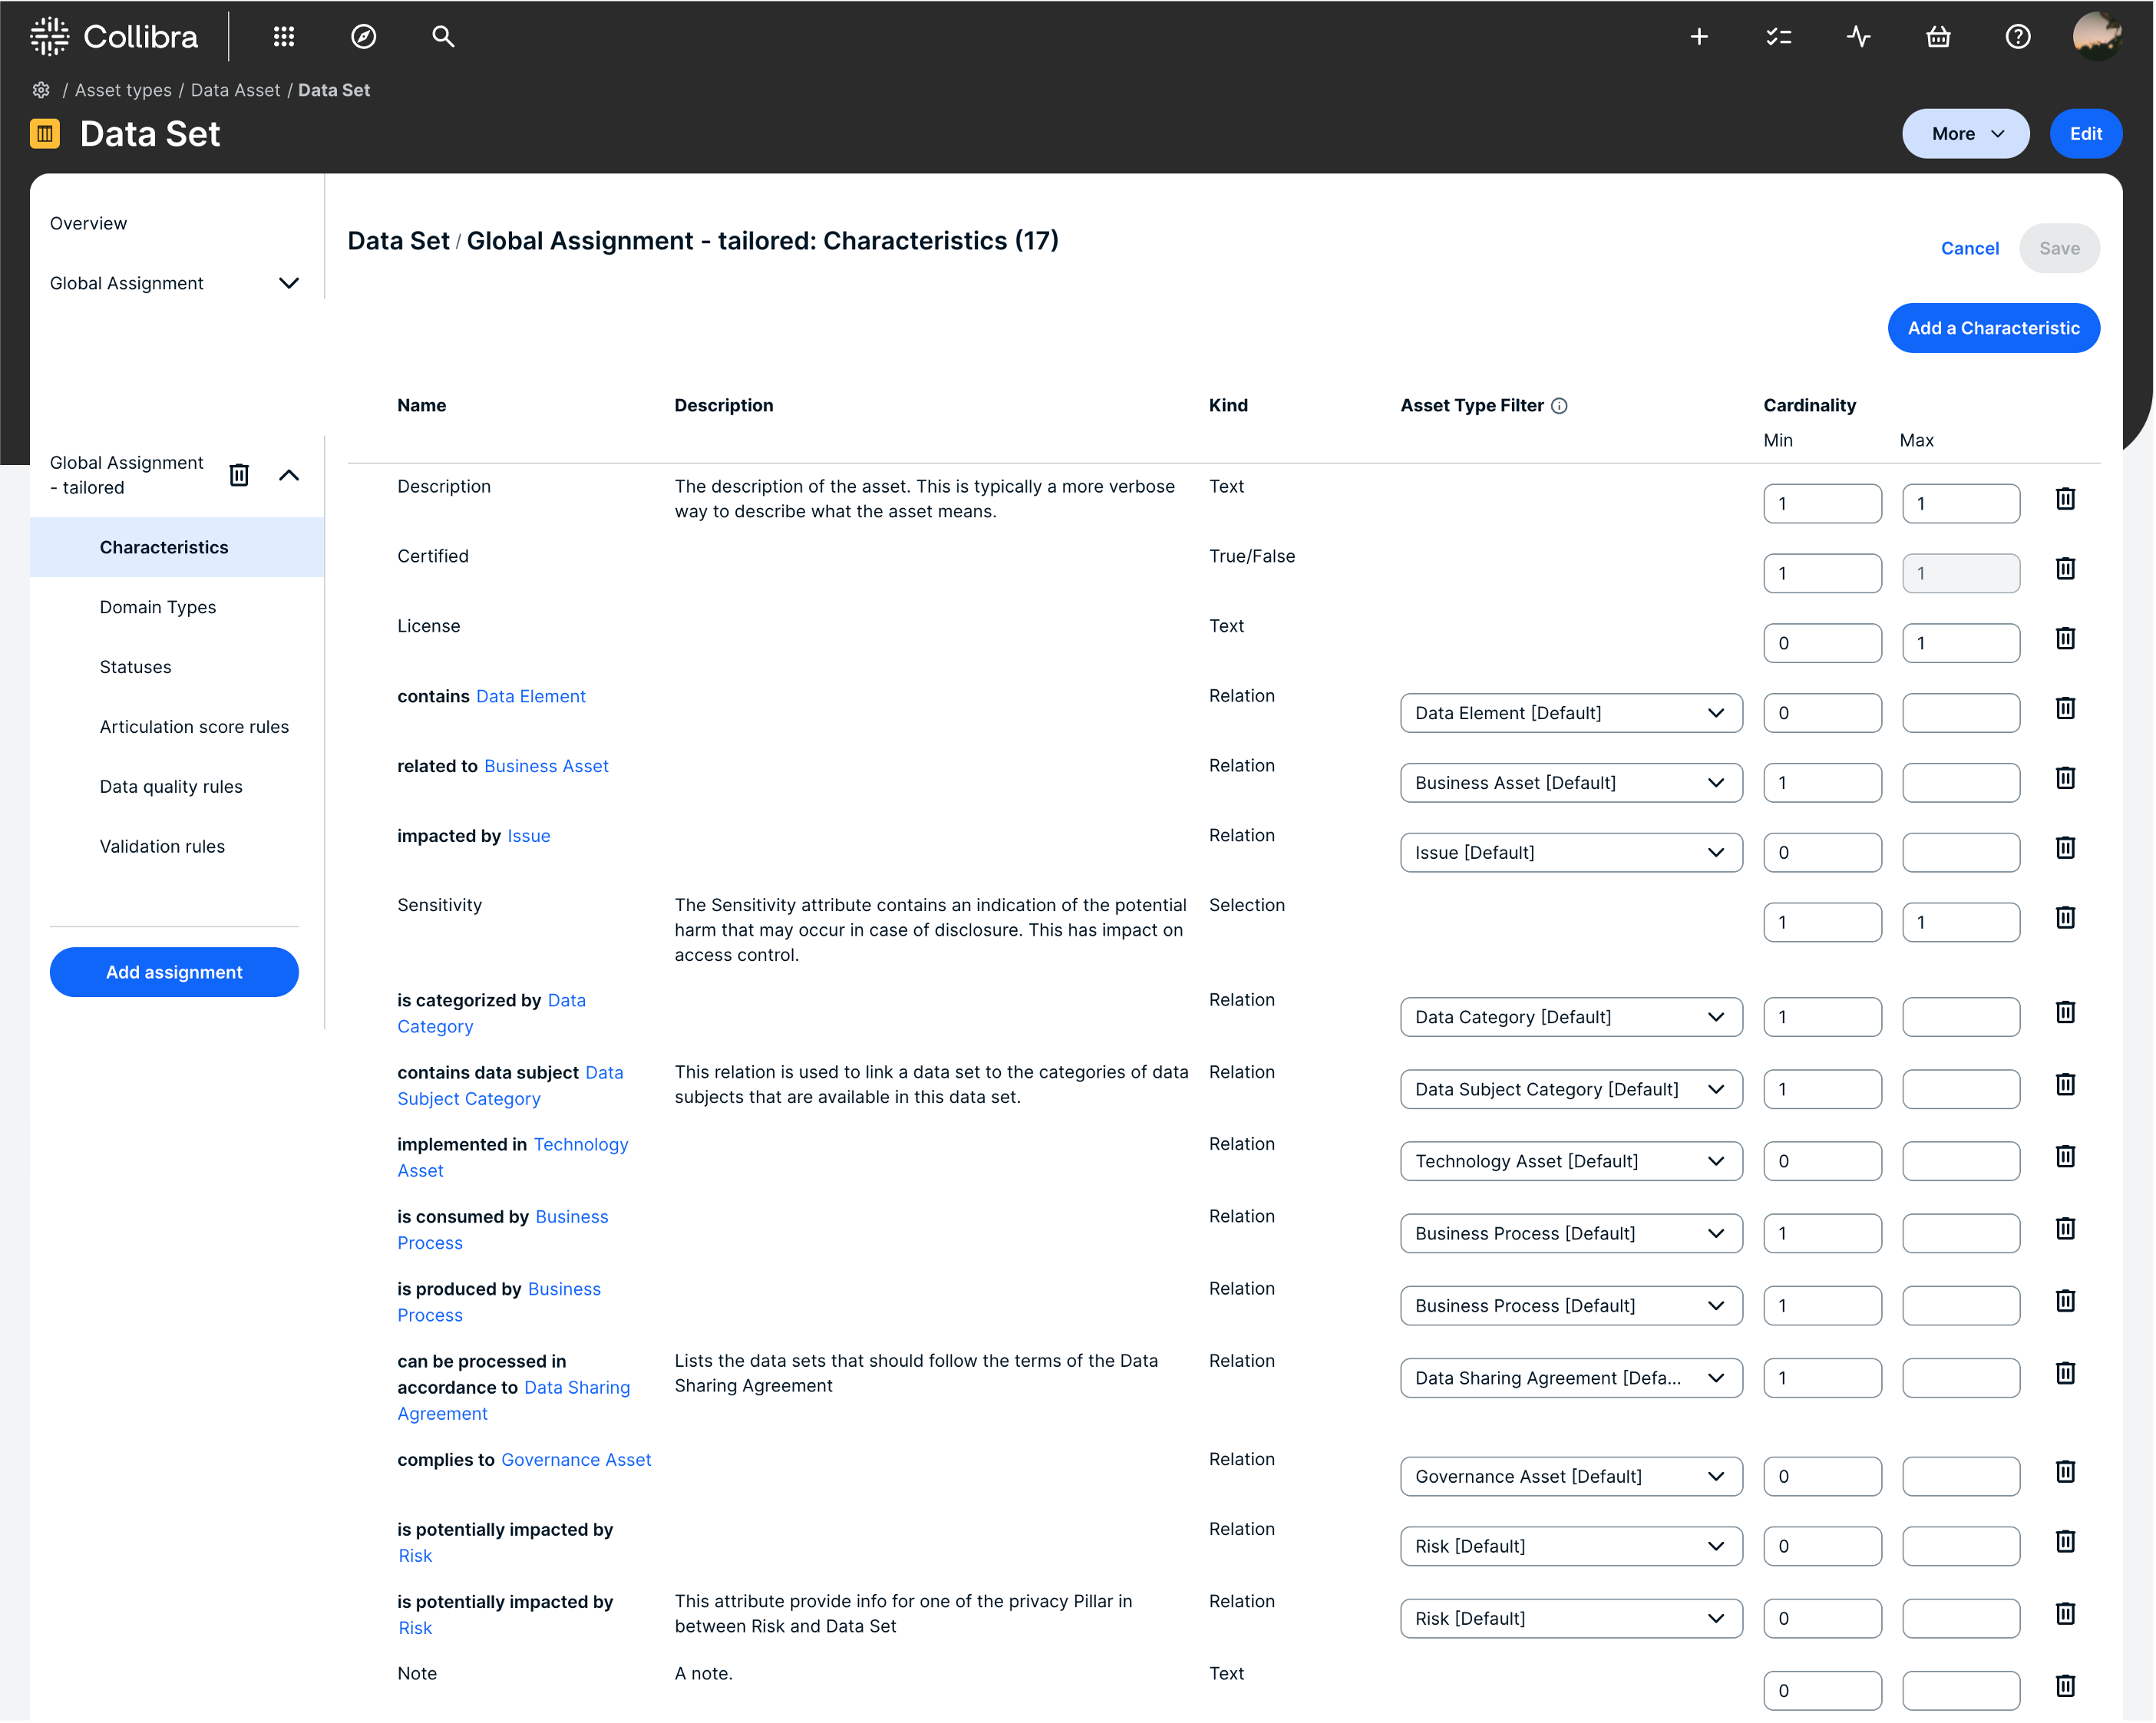
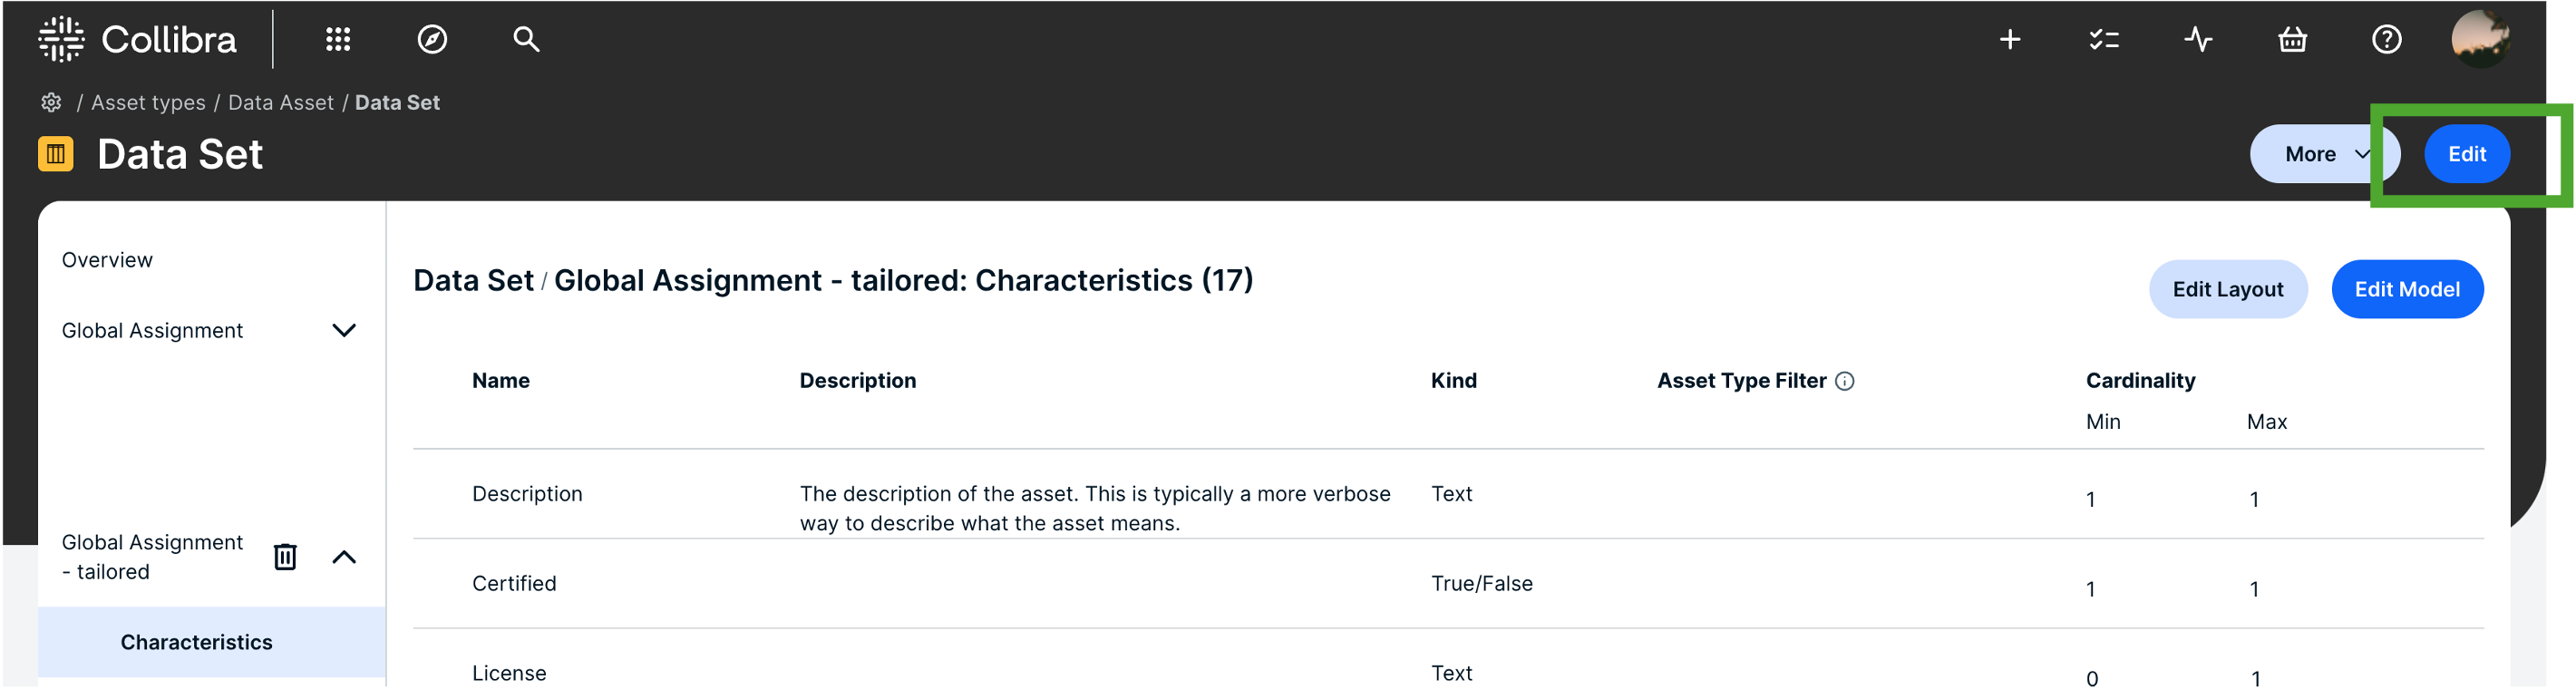
Getting back to the asset’s “Global Assignment → Characteristics” page, we see what characteristics are assigned to the asset type, what the characteristics’ descriptions are, what kind of metadata this is, what asset type filter belongs to the relation (i.e., the asset type (and its descendants) you want to see when creating a relation), and the characteristic’s cardinality. The cardinality has a “Min” and a “Max”.
When the cardinality “Min” is filled with 1, you will always see the characteristic on the asset page, whether it is empty or not. Note, however, that it should be included in the layout as well. When the “Min” is filled with 0, you should first press the “Show empty optional fields” toggle to see the field on the asset page. Again, the characteristic should be included in the layout. Otherwise, the characteristic will not be shown on the asset page.
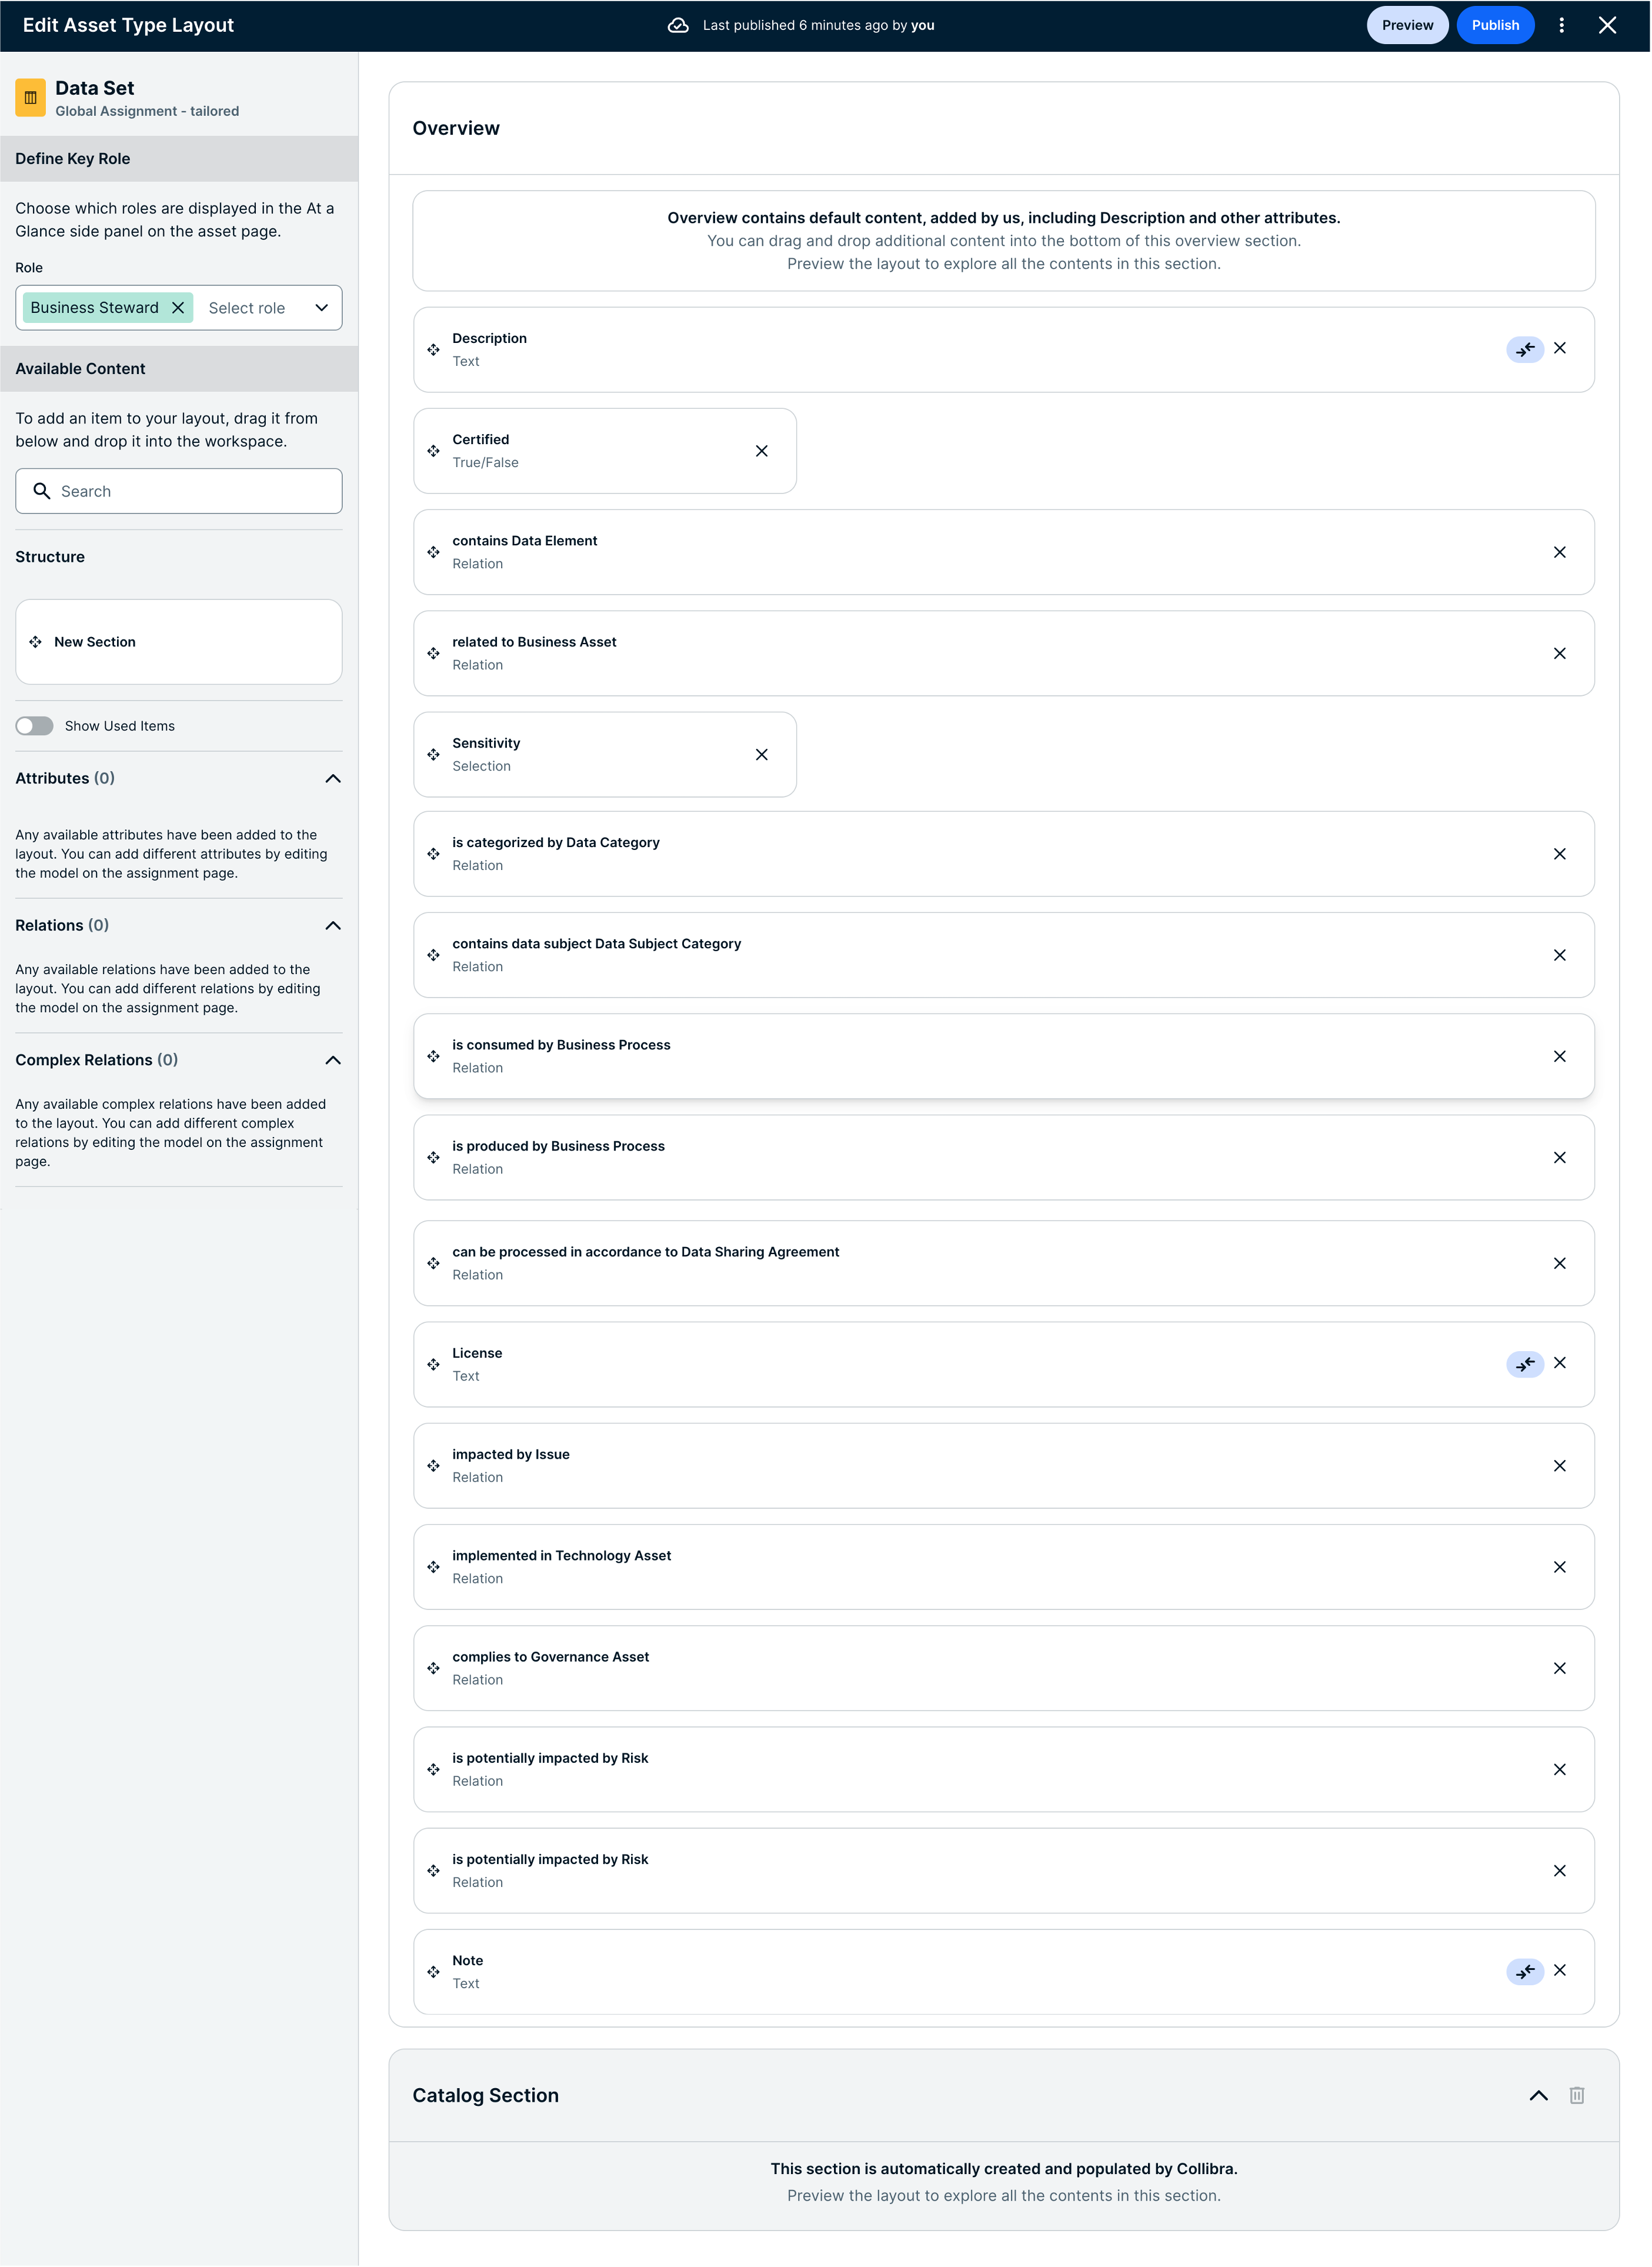
In the picture above we see that, by default, several characteristics are assigned to the asset type. When all these characteristics are included in the “Layout” as well, the layout, and accordingly the asset page, will look like this:
Layout (get there by pressing “Edit Layout”):
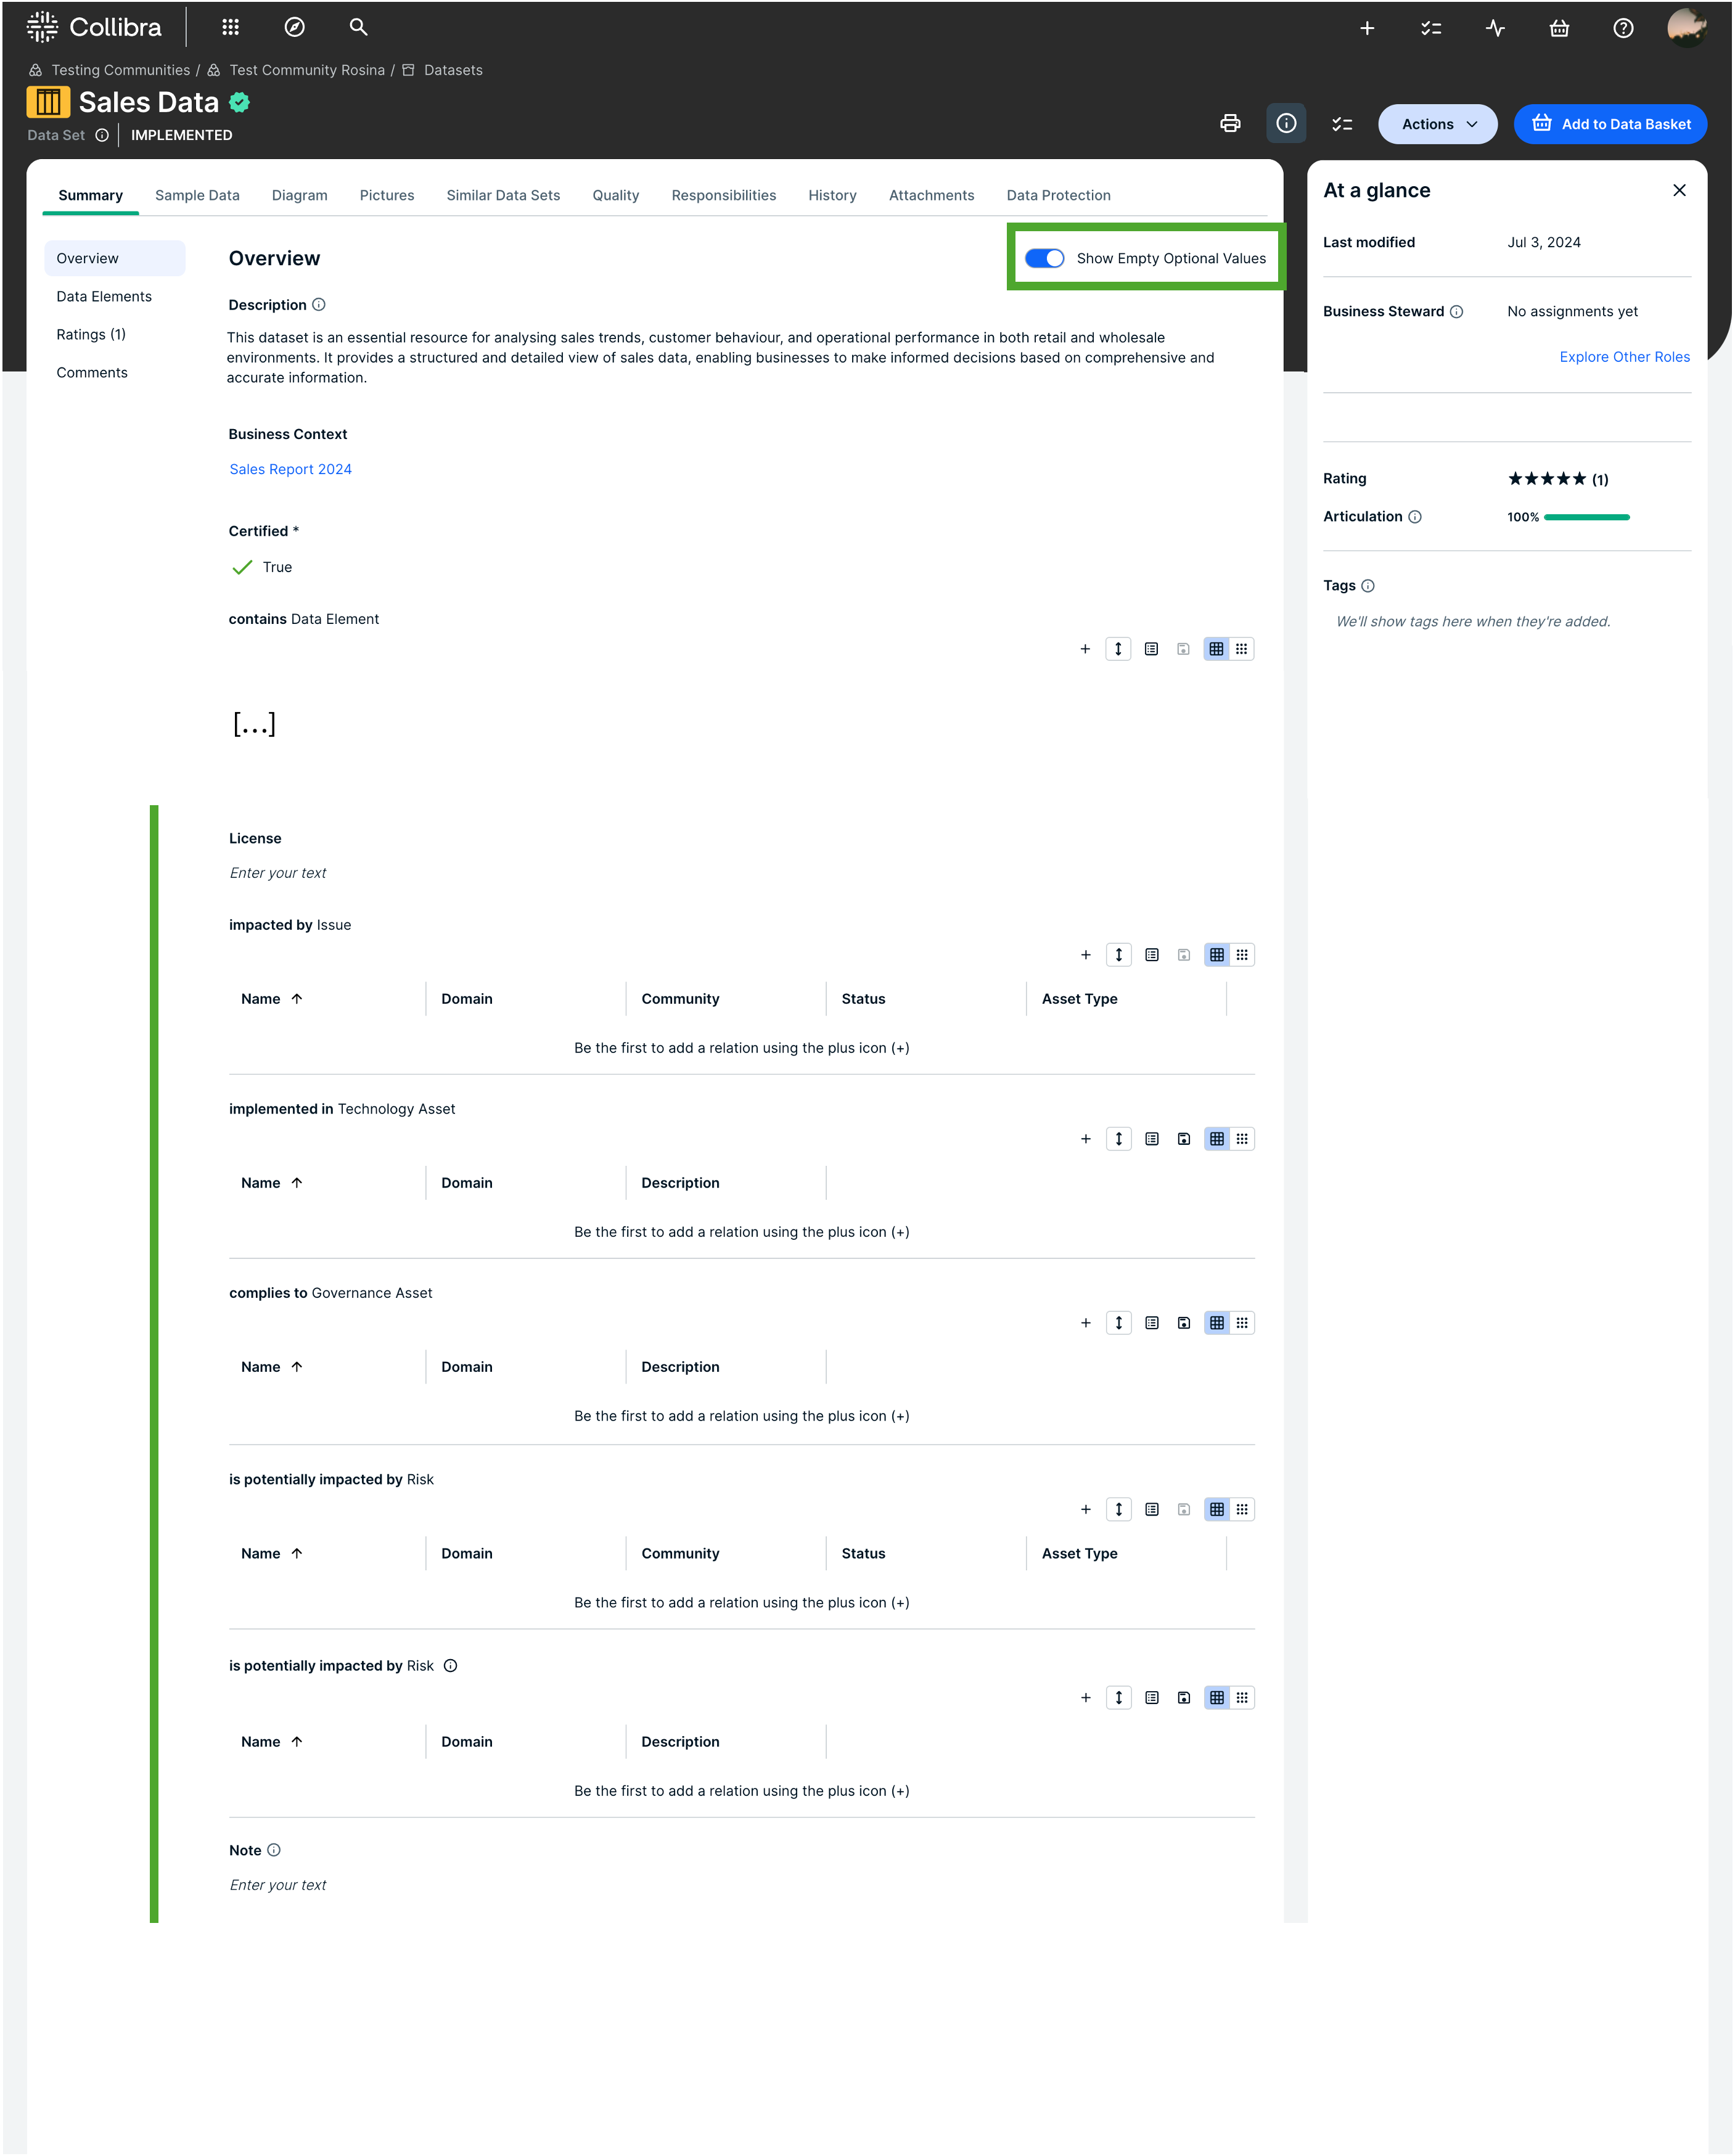
Asset Page without “Show Empty Optional Values” toggle on:
When activating the “Show Empty Optional Values” toggle, fields that are not filled in ánd have a ‘0’ as Min Cardinality, will be shown as well:
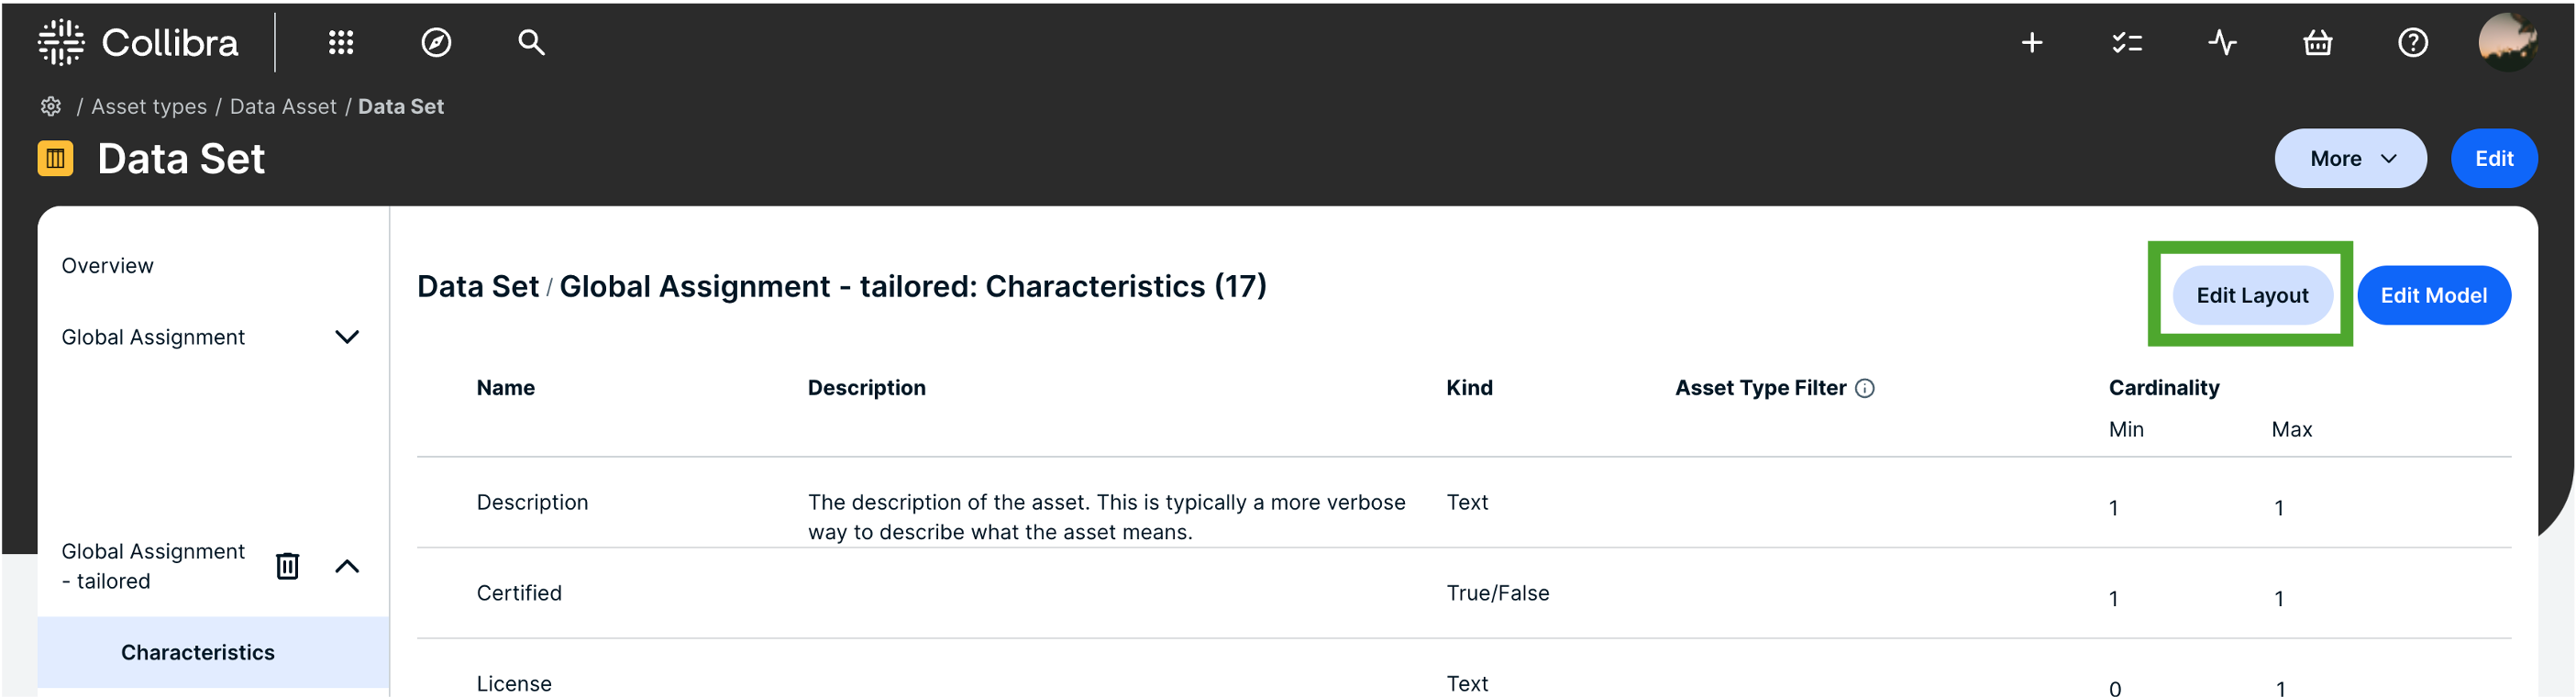
Edit Model & Edit Layout
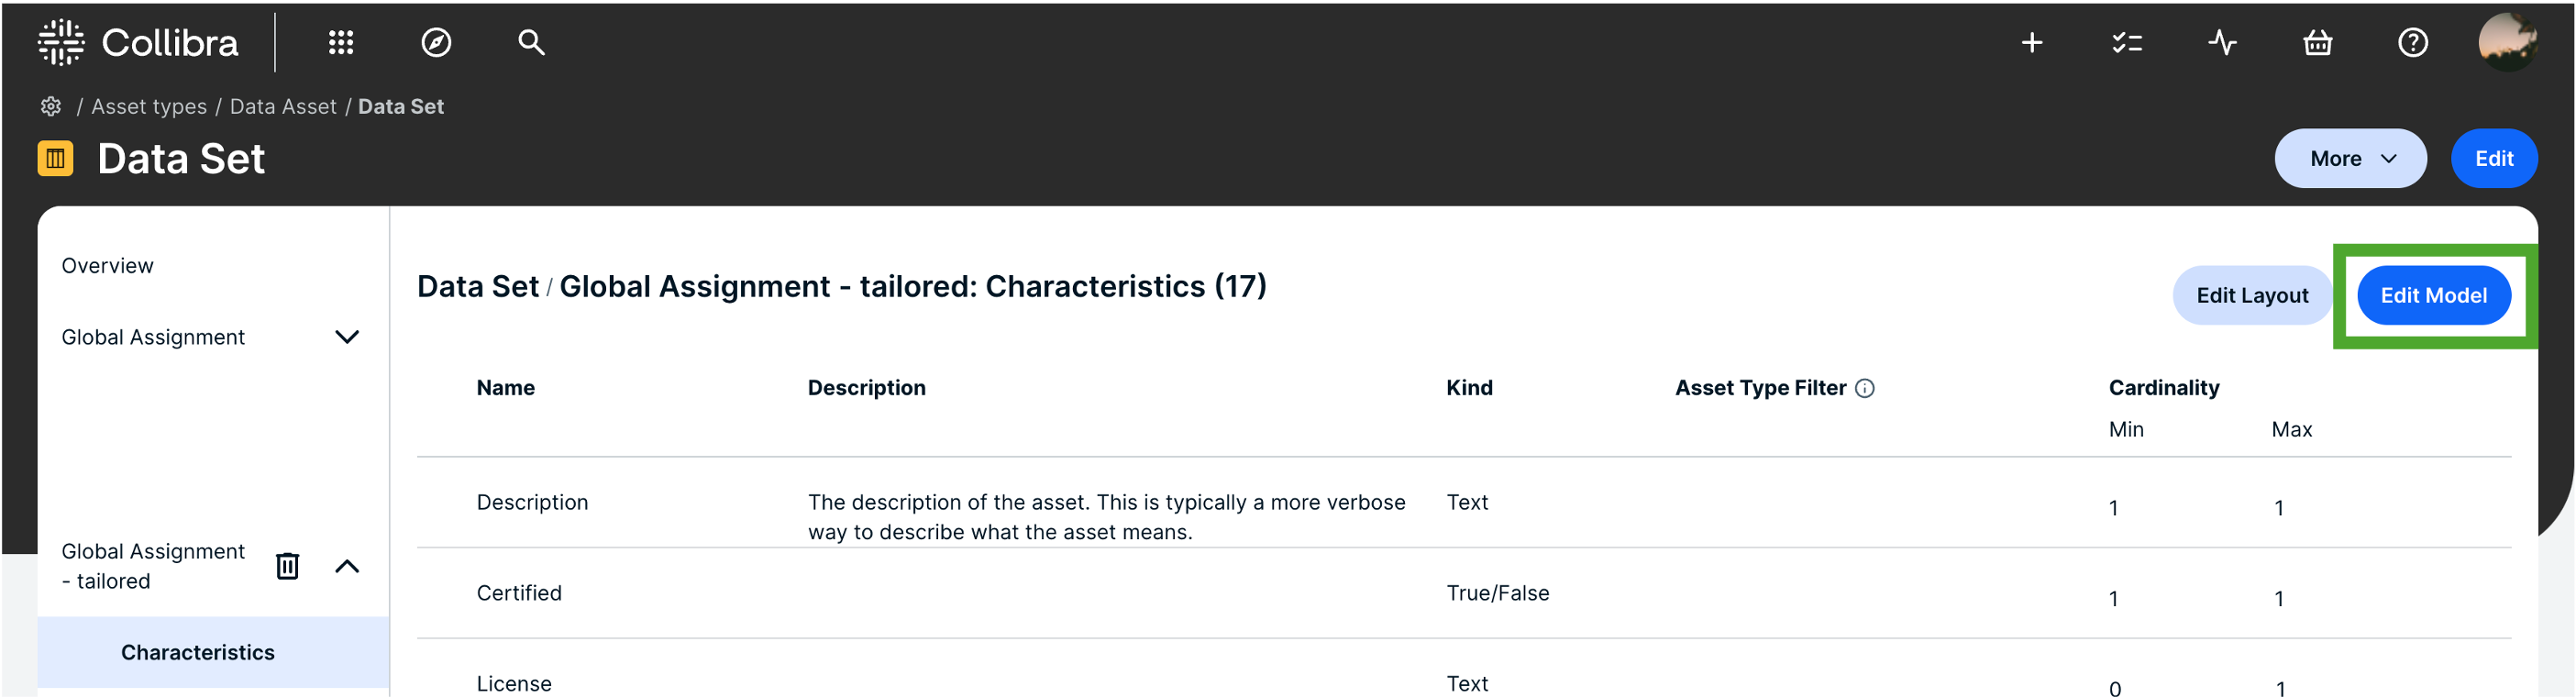
When pressing the “Edit Model” button, you can adjust what characteristics you want to be assigned to the asset. Characteristics can be deleted or added, the asset type filter can be adjusted, and the cardinality can be changed. Note that, to add a new assignment to the asset type, you should first create a new scope via “Settings → Operating Model → Scopes”, add this scope to your community or domain, and add the assignment to the relevant asset type in “Settings → Asset Types → (asset type of your choice) → Add Assignment”.
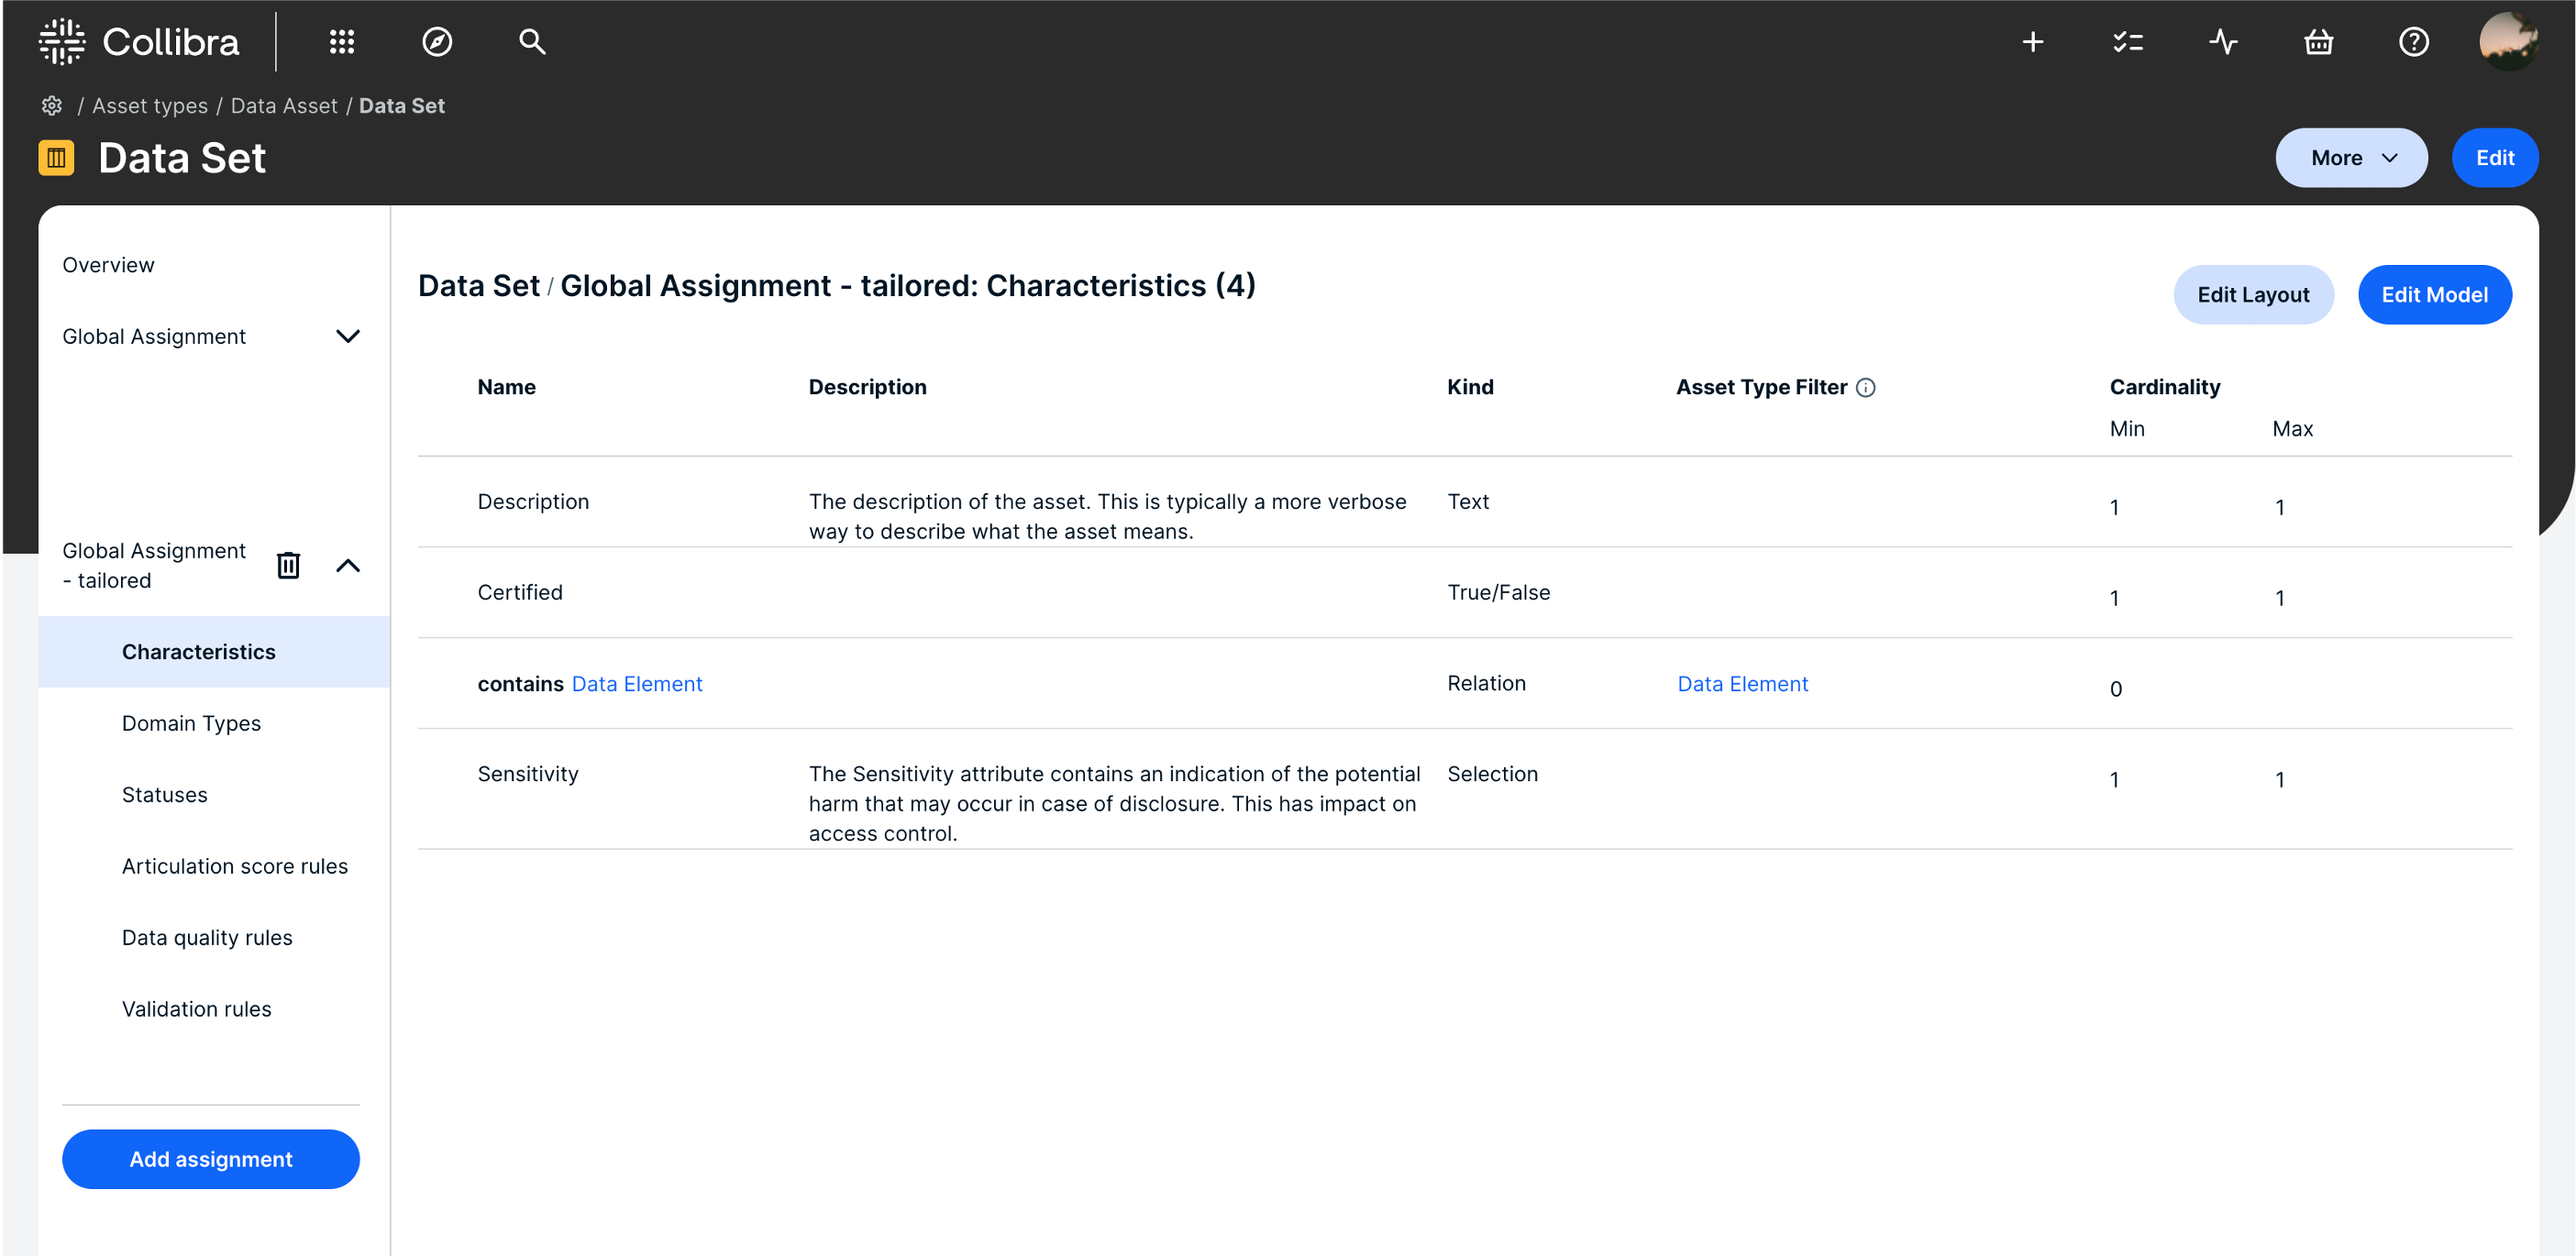
Let’s say, we now only want to show the “Description”, “Sensitivity”, “Certified” and the “contains Data Element” characteristics on the asset page of the Data Set, within the assigned community or domain (scope). We then, accordingly, adjust the model and the layout.
Tailoring the model:
Tailoring the layout:
By pressing the “Edit Layout” button, besides dragging assigned characteristics to the asset page layout, you can also determine if you want characteristics to be shown next to each other or below one another. Let’s say we want the ‘Description’, ‘Sensitivity’, and ‘Certified’ attributes to be shown next to each other, and the ‘contains Data Element’ relation to be shown below this, we tailor the layout as follows.
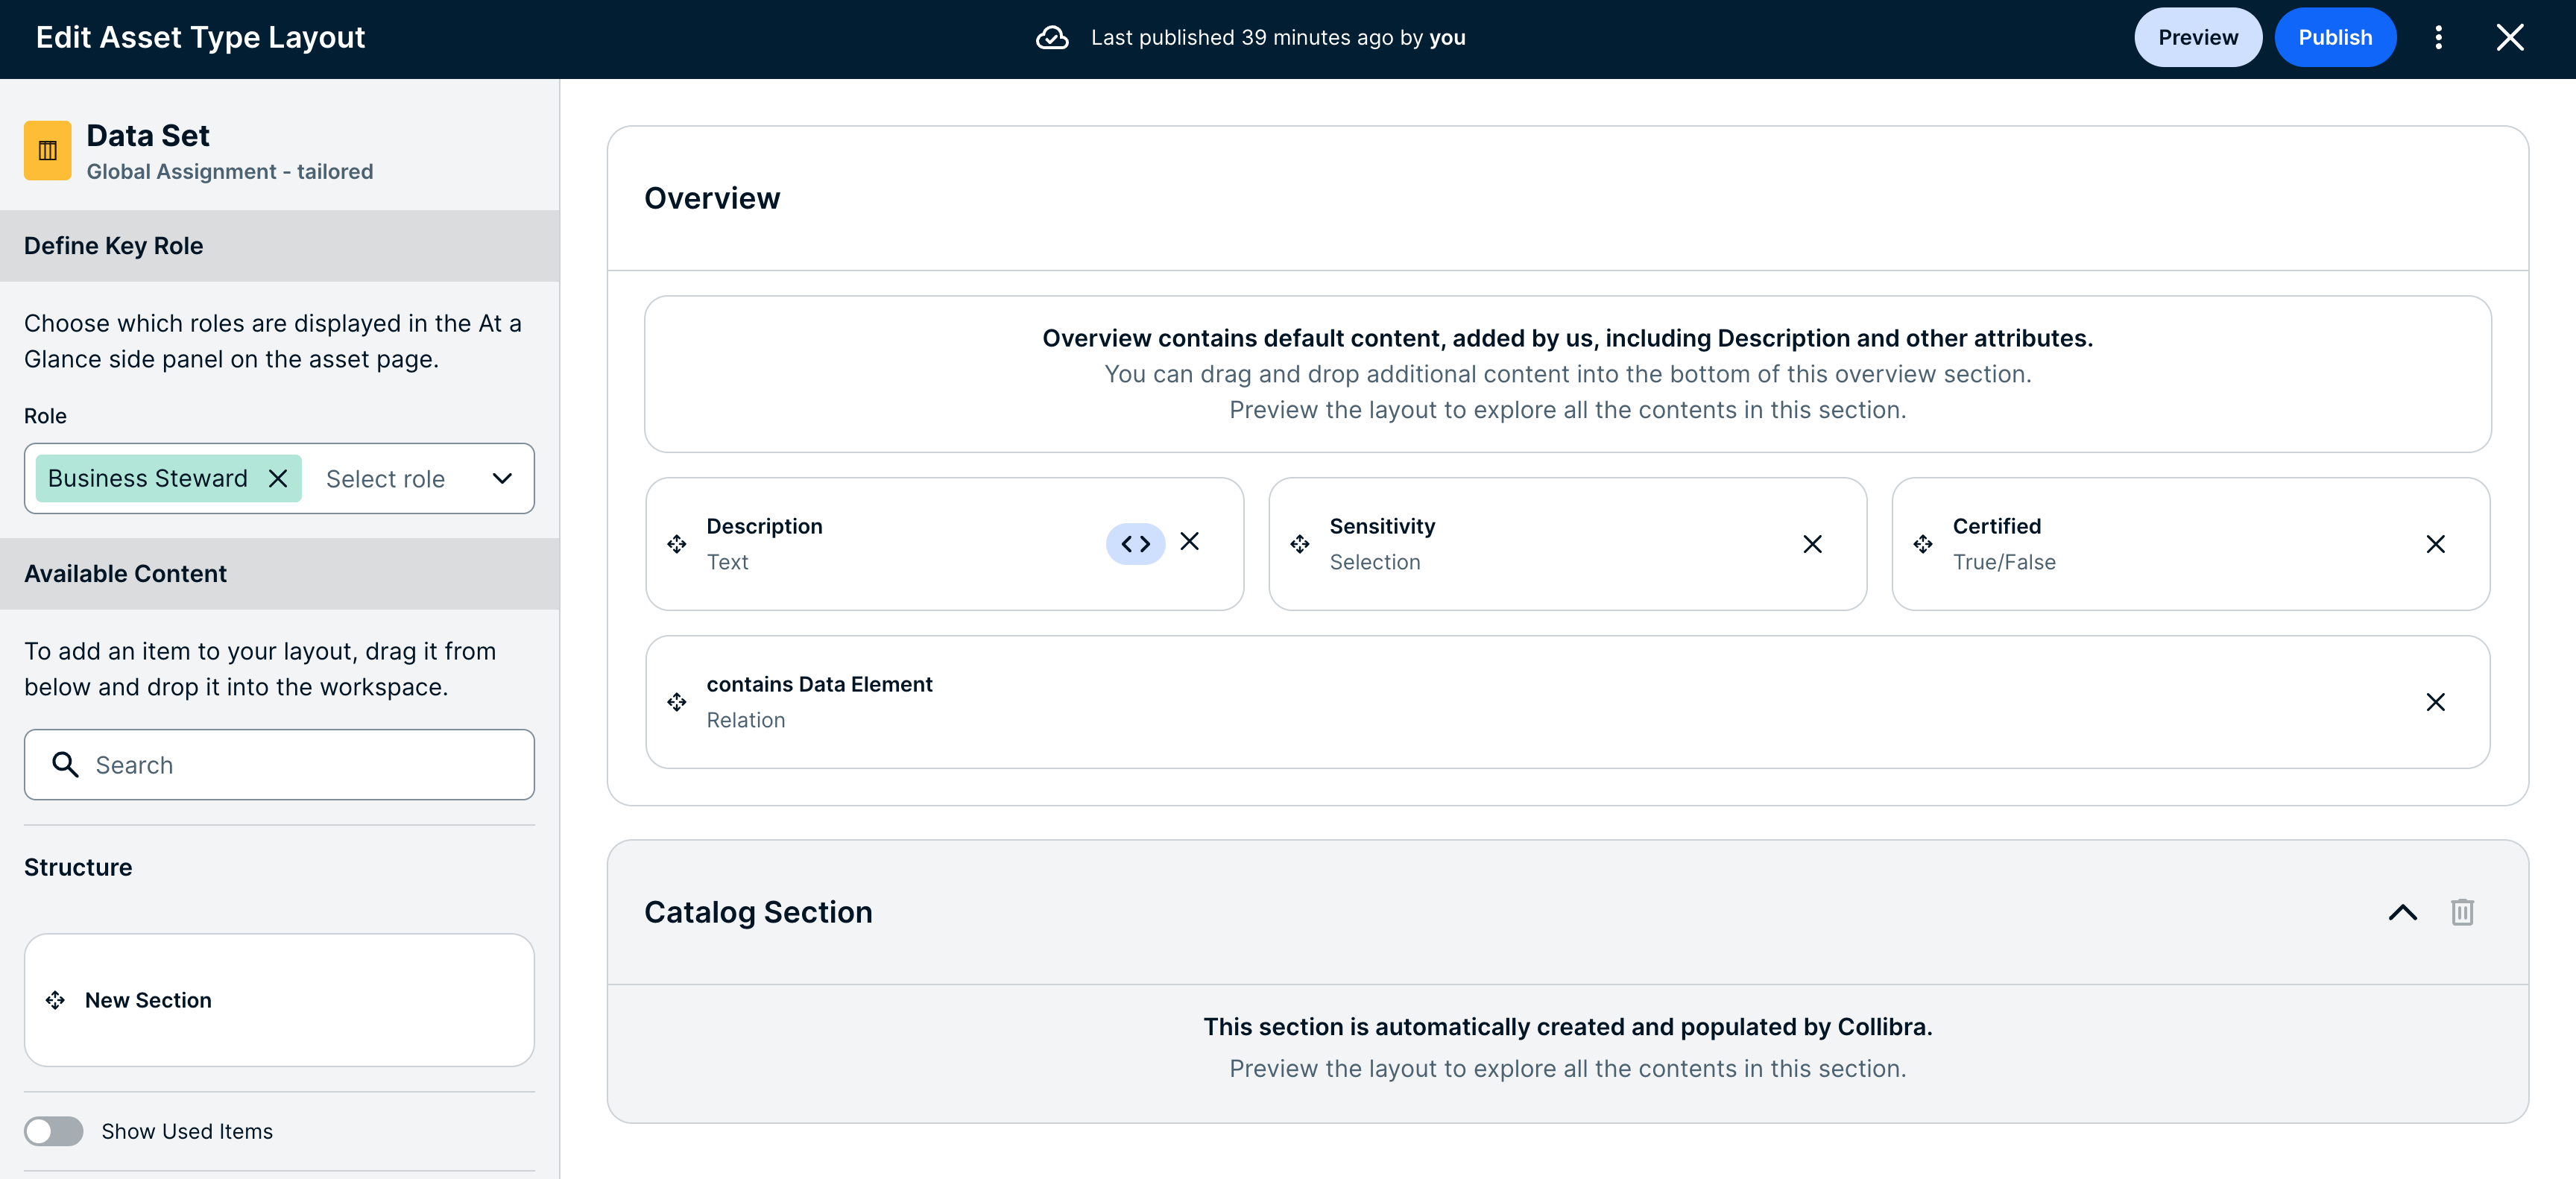
After implementing these changes, the updated assignment should be shown on the asset page, and other characteristics will, now, not be shown on the asset page anymore.

The upper “Description” and “Business Context” are default, non-removable characteristics included in the Overview’s default content added by Collibra. The same goes for the Catalog Section.
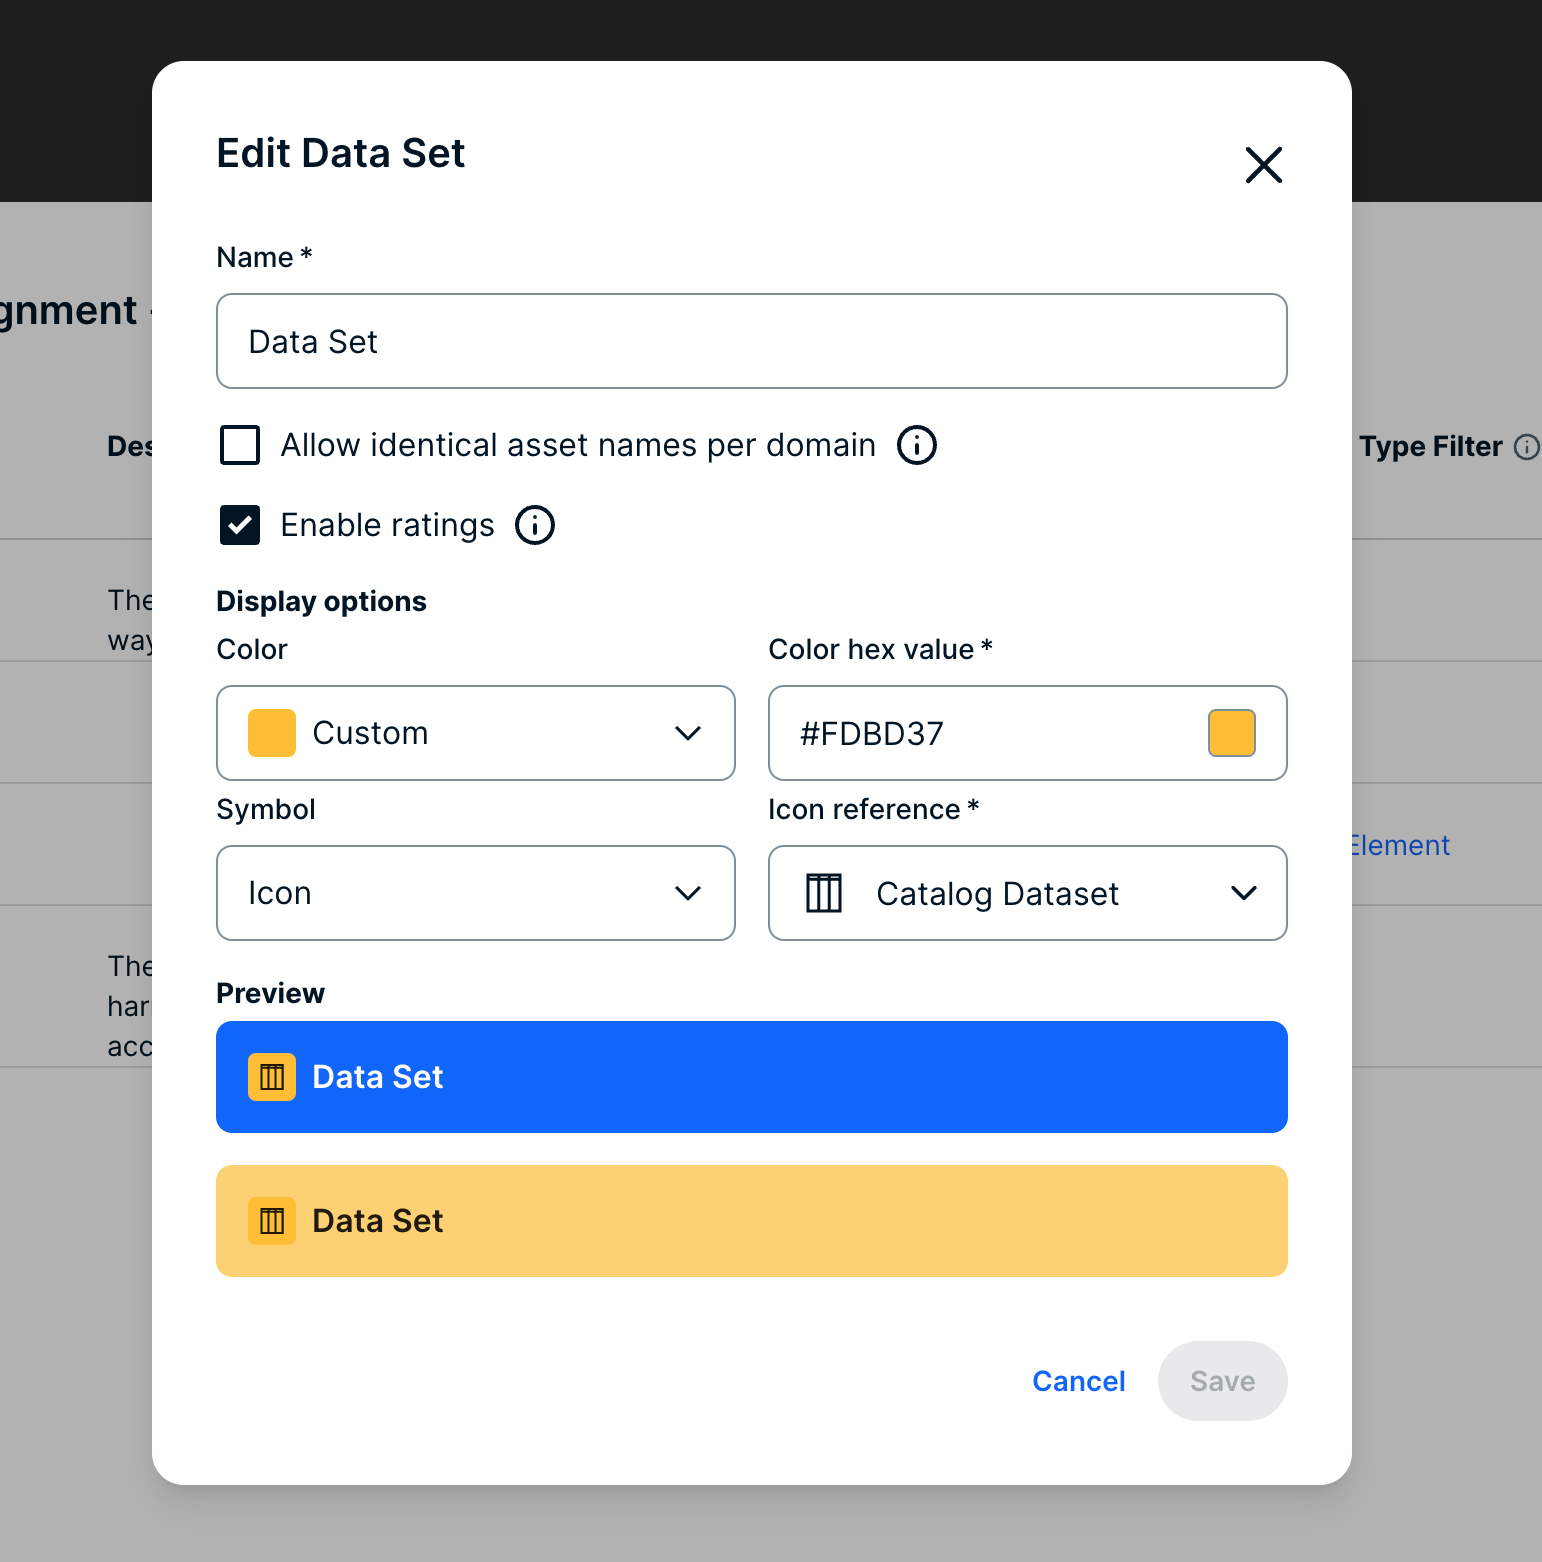
Edit
Through the “Edit” button, you can tailor the asset’s icon and colour, to, if you wish, adjust assets to meet your organisation’s branding even more.
Key takeaways
The new UI/UX introduces an “At a glance” field on the asset page, which provides a quick summary of key asset information.
Users can adjust asset pages to their needs, including deciding whether or not to display empty fields.
Just like in the previous UI, users can adjust the scope of the asset page to display preferred characteristics. Additionally, users can customise the layout and the asset’s icon and colour.
Best Practices for Adjusting Scope
Maintain the Global Assignment settings to preserve default settings. Instead, add new assignments to customise the scope as needed.
Document the asset model and its mandatory characteristics (relations and attributes) beforehand. This documentation helps with collaborative decision-making regarding the display of characteristics and keeps an up-to-date overview of the asset model.
This blog covered the customisation options for asset pages in Collibra’s new UI and guidance on how to effectively implement these changes.
Want to know more about Data Governance?
Curious to know all the ins and outs of Data Governance? On our website you will find all recent developments regarding Data Governance.